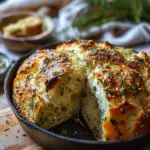
Introduction to Garlic Herb Dutch Oven Bread
The joy of homemade bread
There’s something incredibly satisfying about baking your own bread. The smell that wafts through your kitchen as it rises is not just about the deliciousness to come; it’s an act of love, tradition, and creativity. Homemade bread provides you a wonderful canvas for culinary expression, especially with the addition of garlic and fresh herbs. Picture yourself slicing into a crusty, golden loaf, steam rising, revealing a soft, fluffy interior. It’s a simple pleasure that resonates deeply with many of us, isn’t it?
Why a Dutch oven makes a difference
Now, you might wonder why a Dutch oven is such a game changer in the bread-baking world. The magic lies in how it replicates the conditions of a professional bread oven. When you place your dough inside this heavy lidded pot, it captures steam, creating a moist environment that promotes a perfect rise while developing a beautifully crisp crust. According to experts from the Bread Bakers Guild of America, using a Dutch oven enhances the bread’s texture and flavor, making your Garlic Herb Dutch Oven Bread an irresistible treat.
Research on homemade vs. store-bought bread
While there’s nothing wrong with grabbing a loaf from the store, research shows that homemade bread can often be healthier. A study published in the Journal of Cereal Science indicates that homemade bread can contain less sodium and preservatives than its store-bought counterparts. Plus, when you bake from scratch, you have complete control over the ingredients. Choose high-quality flour, organic garlic, and fresh herbs, and you can create a version that’s not only healthier but also richer in flavor.
So why not take the plunge? Every bite of your Garlic Herb Dutch Oven Bread is a reminder of the time and care you’ve put into your culinary craft. Plus, you can impress friends and family with your baking prowess. Ready to start? Let’s get into the delicious details!
Ingredients for Garlic Herb Dutch Oven Bread
When it comes to baking the perfect Garlic Herb Dutch Oven Bread, the right ingredients make all the difference. Let’s break it down into dry and wet ingredients, plus some important dietary considerations.
Dry Ingredients
For a fluffy and flavorful bread, you’ll need:
- 3 cups all-purpose flour
- 1 ½ teaspoons salt
- 1 teaspoon instant yeast
- 1 tablespoon garlic powder (for that irresistible garlic flavor)
- 1 tablespoon dried herbs (like rosemary or thyme)
These dry ingredients are the foundation of your bread, giving it structure and taste.
Wet Ingredients and Flavorings
Next up, the wet ingredients that bring it all together:
- 1 ½ cups warm water (about 110°F)
- 2 tablespoons olive oil (adds richness)
- Fresh herbs (optional, for a fragrant touch)
The warmth of the water helps the yeast activate, while the olive oil enriches the texture of the loaf.
Dietary Considerations
For those with dietary concerns, this Garlic Herb Dutch Oven Bread recipe is vegetarian-friendly and can be easily adjusted for vegan diets by omitting the olive oil or substituting it with a plant-based alternative. Always check flour sources for gluten-free options if needed.
For more tips on ingredient substitutions, check out this guide on baking essentials. Happy baking!
Step-by-step preparation of Garlic Herb Dutch Oven Bread
Making Garlic Herb Dutch Oven Bread at home is not just a culinary project; it’s a delightful experience that fills your kitchen with tantalizing aromas. In just a few simple steps, you can create a crusty, flavorful loaf that’s perfect for any occasion. Let’s dive into the step-by-step process!
Gather and mix your ingredients
Start by assembling your ingredients. For a basic Garlic Herb Dutch Oven Bread, you’ll need:
- 3 cups all-purpose flour
- 1½ teaspoons salt
- 1 teaspoon sugar
- 1 teaspoon instant yeast
- 1½ cups warm water (about 110°F)
- 2 tablespoons minced garlic (fresh or jarred)
- 2 tablespoons chopped fresh herbs (like rosemary, thyme, or parsley)
- Optional: Olive oil for greasing
Mixing your dry ingredients first is key. In a large mixing bowl, whisk together the flour, salt, sugar, and instant yeast. This ensures that your yeast will be evenly distributed, giving your bread the lift it needs. If you’re eager to experiment, consider reading about yeast fermentation to understand how the magic happens.
Combine the wet and dry ingredients
Once you have your dry ingredients sorted, it’s time to bring in the wet ones. Gradually add the warm water to the dry mix, stirring until you form a shaggy dough. Don’t fret if it looks a bit messy; that’s how it should be. Then, fold in the minced garlic and your choice of herbs to infuse the dough with delicious flavors.
Here’s a pro tip: If you want to elevate your bread even further, consider adding some grated Parmesan cheese to the mix. The result? A flavor explosion!
Let the dough rest and develop flavors
Now comes the waiting part, which is crucial for developing those rich flavors and achieving the perfect texture. Cover your bowl with a clean kitchen towel or plastic wrap and let it sit at room temperature for about 12-18 hours. Yes, you read that right! Overnight is often best, allowing the dough to rise slowly and develop that beautiful flavor profile characteristic of artisan bread.
During this time, the gluten develops and the dough will become bubbly—an exciting sign that your Garlic Herb Dutch Oven Bread is on its way!
Preheat your Dutch oven
About 30 minutes before your dough is ready to bake, preheat your oven to 450°F (230°C) and place your empty Dutch oven (with the lid on) inside. Why do this? Preheating the Dutch oven creates a mini-oven effect that traps steam, resulting in that gorgeously crisp crust we all crave.
If you don’t have a Dutch oven, no worries! You can use a cast-iron skillet or another oven-safe pot with a lid—just ensure it’s adequately preheated.
Shape the dough and prepare for baking
Once your dough has rested and risen, it’s time to shape it. Flour your countertop and gently turn the dough out onto the surface. Using floured hands, form it into a loose ball. No need to over-knead here; a gentle hand will do.
Once shaped, place the dough on a piece of parchment paper for easy transport to the hot Dutch oven. Cover it with a kitchen towel and let it rest for another 30 minutes while your oven heats.
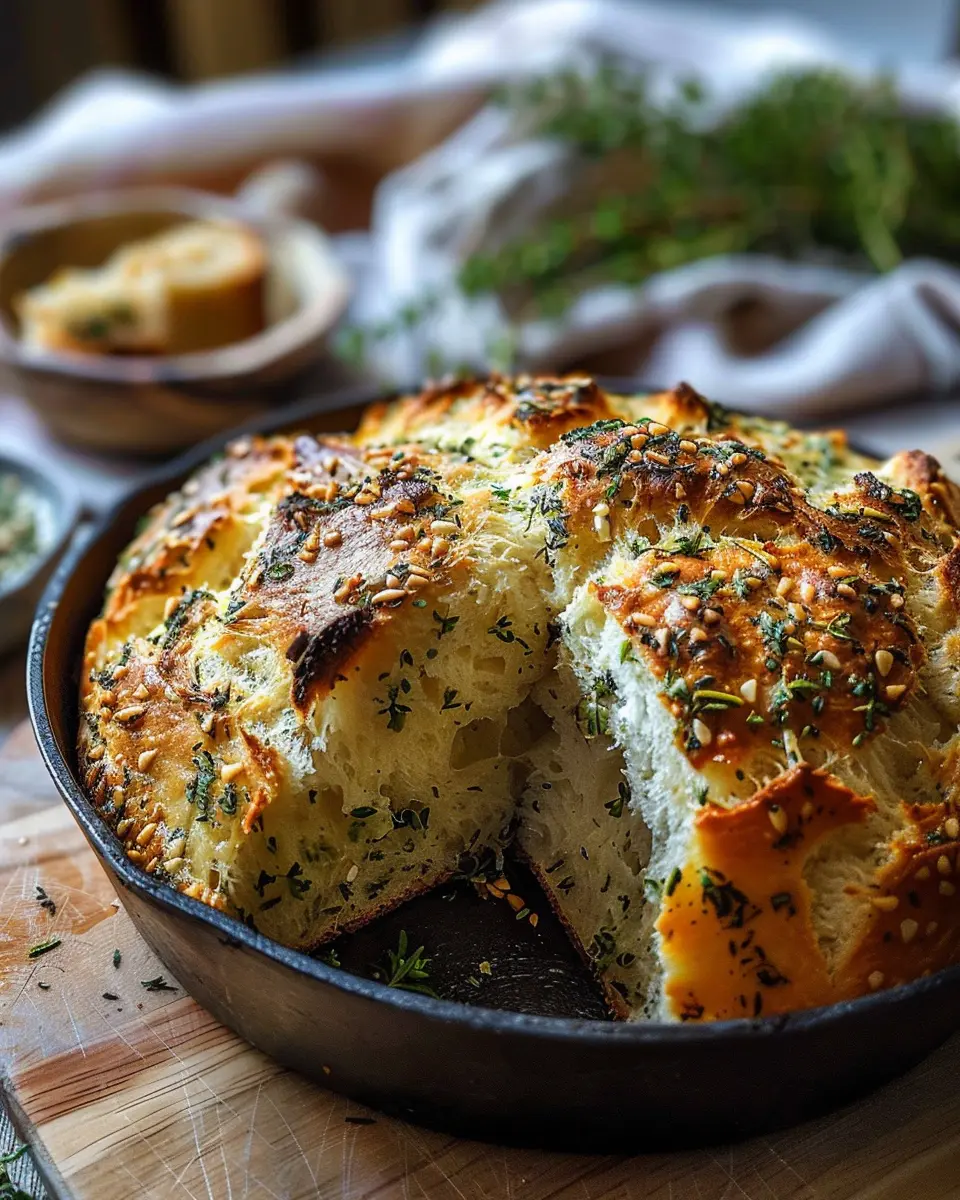
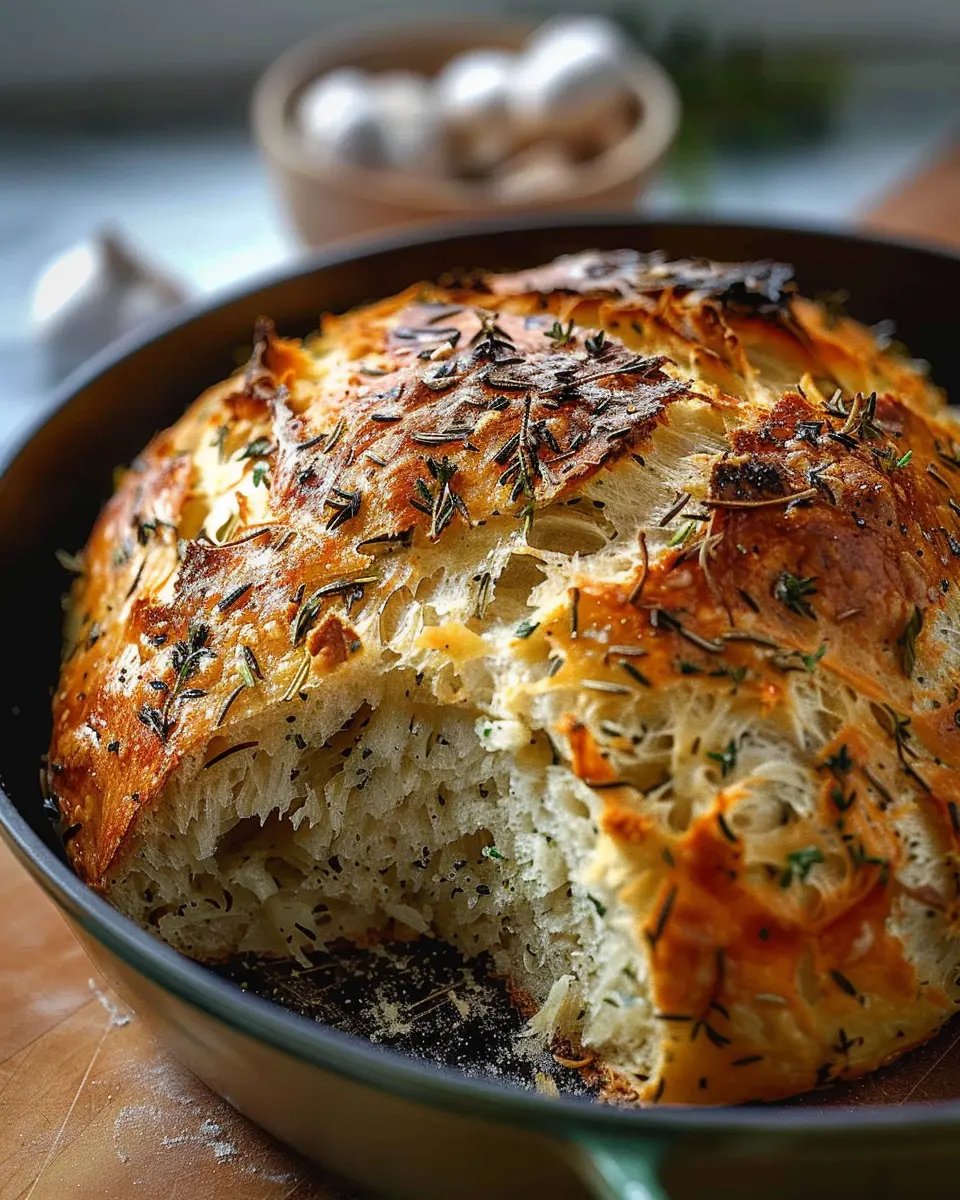
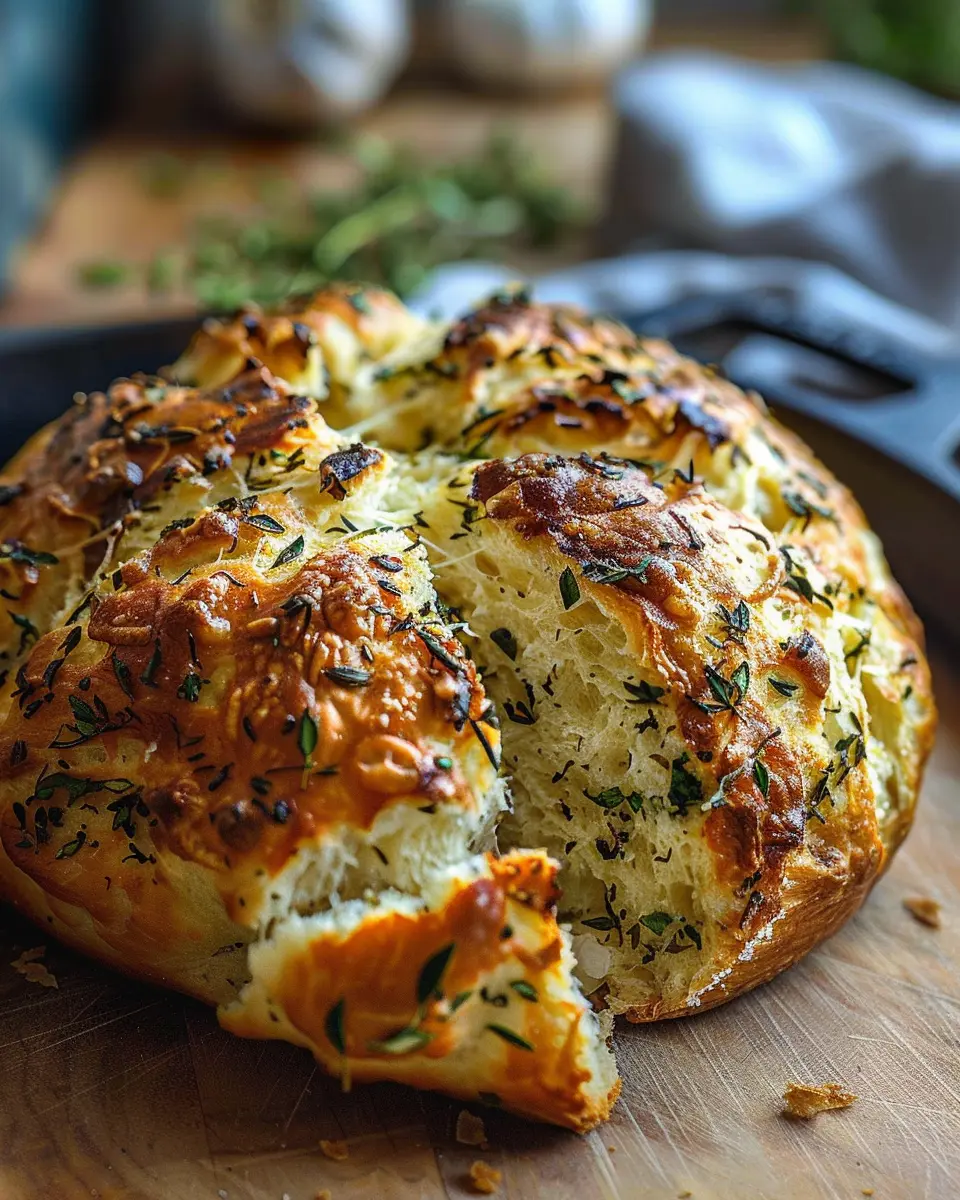
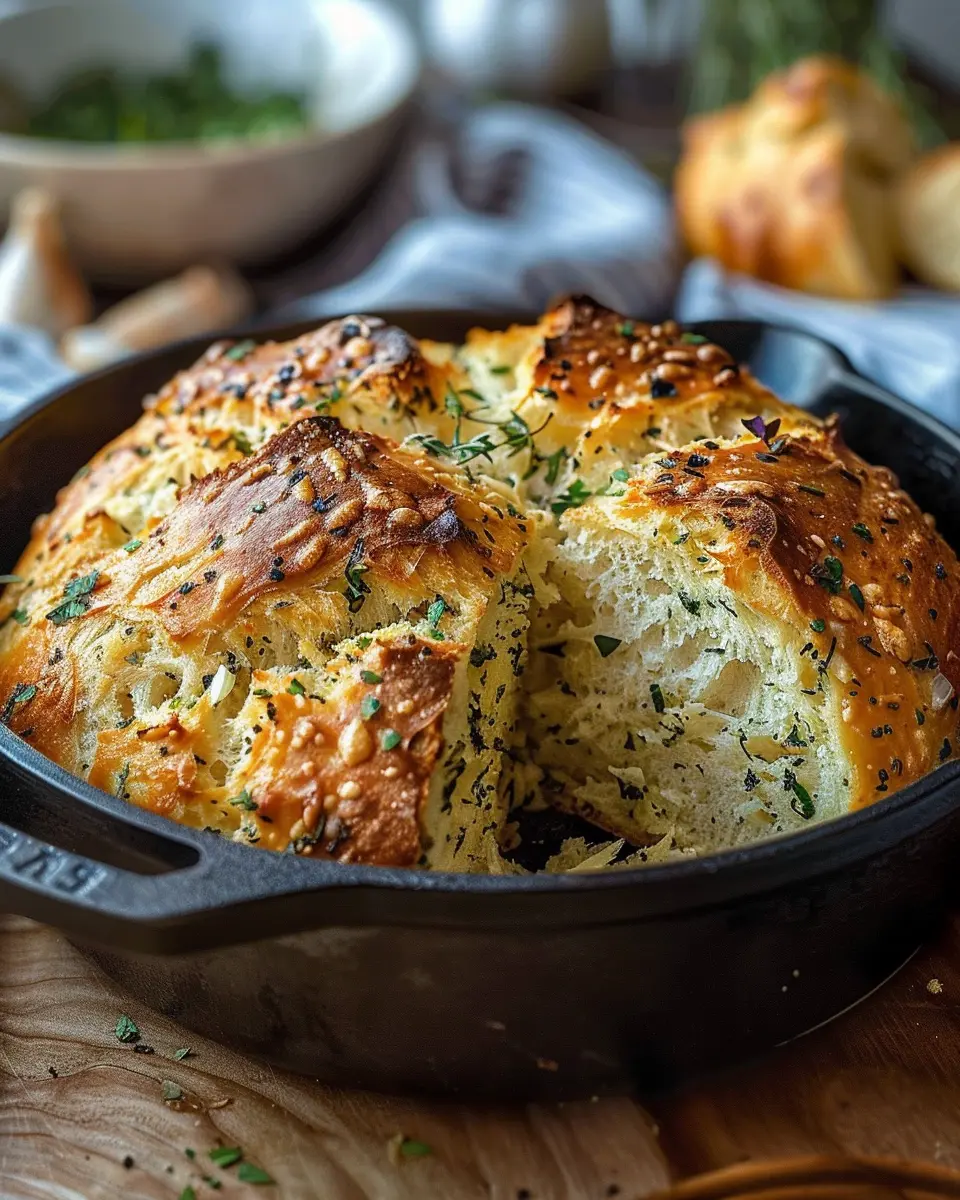
Bake the bread and achieve the perfect crust
This is where the magic happens! Carefully remove the hot Dutch oven from the oven, and with the parchment paper, transfer the shaped dough into it. Cover it with the lid and bake for 30 minutes. Then, remove the lid and bake for an additional 15-20 minutes until the crust is deeply golden and crispy.
The internal temperature of the bread should be about 200°F (93°C) when it’s done. Give it a tap; if it sounds hollow, you’ve nailed it!
Let your Garlic Herb Dutch Oven Bread cool on a wire rack before slicing. The aroma will be so enticing that you might find it hard to wait. Enjoy this rustic bread as a side for soups, spreads, or—as many do—simply with butter.
Now you’re ready to impress friends and family with your homemade bread skills! What will you pair it with?
Variations on Garlic Herb Dutch Oven Bread
When it comes to Garlic Herb Dutch Oven Bread, the possibilities for customization are endless. Let’s explore some creative ways to make this delightful bread even more special!
Add Different Herbs
While the classic combination of garlic, rosemary, and thyme is hard to beat, why not broaden your herb palette? Consider incorporating:
- Oregano for an Italian twist.
- Basil to give your bread a sweet, aromatic touch.
- Sage for a hearty, earthy flavor.
Mixing and matching these herbs can elevate your bread to match your favorite dishes, whether it’s a cozy pasta night or a summer salad party.
Experiment with Other Flavors
Beyond herbs, think about adding unique flavors to your Garlic Herb Dutch Oven Bread. For an exciting kick, try:
- Cheeses: Mix in finely shredded parmesan or a crumbly feta for a richness that complements the garlic.
- Sun-dried tomatoes or olives: These ingredients can provide bursts of flavor that are perfectly paired with the herb-infused bread.
You might find a new favorite combination that has your friends asking for the recipe!
Make It Gluten-Free
If you’re looking to create a gluten-free version of this delightful bread, it’s entirely possible! Opt for a gluten-free all-purpose flour blend to maintain the texture and taste. Adding a bit of xanthan gum can help mimic the chewy properties of wheat flour, ensuring your Garlic Herb Dutch Oven Bread remains satisfying for everyone at the table.
Embracing these variations not only enhances your baking experience but also allows you to personalize this recipe to your tastes. Who wouldn’t love a loaf tailored to their liking? Check out resources like King Arthur Baking for more tips on gluten-free baking. Happy baking!
Cooking tips and notes for Garlic Herb Dutch Oven Bread
Importance of the resting period
Letting the dough rest is crucial for making Garlic Herb Dutch Oven Bread. This time allows the yeast to ferment properly, creating those delightful bubbles that give your bread its fluffy texture. Aim for at least 30 minutes of resting after kneading. This isn’t just a waiting game; it’s when all those flavors meld together. You’ll notice that the dough becomes easier to work with and that the final loaf has a wonderful crumb. Don’t rush this step!
Achieving the right oven temperature
Oven temperature plays a key role in the success of your bread. Ideally, you want your oven to be preheated to 450°F. A thermometer can help you ensure accuracy—many ovens can be off by a few degrees. A properly heated Dutch oven creates the ideal environment for your Garlic Herb Dutch Oven Bread to bake evenly, trapping steam for that crispy crust we all love. Remember to place the pot in the oven for about 30 minutes before adding your dough, allowing it to get nice and hot.
For more tips on baking bread, check out resources like the King Arthur Baking Company where you can deep dive into techniques and troubleshooting. Happy baking!
Serving suggestions for Garlic Herb Dutch Oven Bread
Pairing with dips and spreads
The flavor-packed Garlic Herb Dutch Oven Bread is an excellent companion for a variety of dips and spreads. Picture this: a warm, crusty loaf, freshly baked, ready to be sliced. Try pairing it with:
- Hummus: Its creamy texture and subtle flavor complement the garlic herbs beautifully.
- Spinach artichoke dip: The richness of this classic dip balances perfectly with the bread’s herbaceous notes.
- Olive tapenade: This Mediterranean treat adds a salty punch that enhances every bite.
For a delightful twist, create a simple herb-infused butter by mixing softened butter with garlic powder and fresh herbs. It’s a quick way to elevate your Garlic Herb Dutch Oven Bread experience!
Serving with meals
This versatile bread works wonders alongside various meals. Consider serving it with:
- Soups: Think hearty minestrone or tomato basil — the bread is great for dunking.
- Salads: A crisp Caesar or Mediterranean salad pairs nicely; the bread adds bulk and flavor.
- Grilled meats: Enjoy slices with Turkey Bacon or Chicken Ham for a fulfilling meal.
Imagine enjoying a weekend brunch with friends, where the aroma of fresh bread mingles with sizzling vegetables and freshly brewed coffee. That’s the joy Garlic Herb Dutch Oven Bread brings to your table! For more ideas on serving, check out resources like The Spruce Eats, where you can explore recipes that perfectly complement your new favorite bread.
Time breakdown for Garlic Herb Dutch Oven Bread
When it comes to crafting the perfect Garlic Herb Dutch Oven Bread, understanding the time commitment can help you seamlessly fit this delicious bread into your day. Here’s how the breakdown looks:
Preparation time
Getting started is a breeze! You’ll need about 15 minutes to gather your ingredients, mix the dough, and let it rest while you visualize that golden-brown crust.
Cooking time
Once your dough has risen, it’s time for cooking! Expect around 30-35 minutes for baking in the dutch oven. This is when the wonderful aroma of garlic and herbs will fill your kitchen, making everyone eager to grab a slice.
Total time
All in all, set aside roughly 1 hour for this delightful baking adventure. From prep to the last delicious bite, every moment is worth it for a bread that’s perfectly crusty on the outside and soft on the inside!
For more tips and techniques on baking with a dutch oven, check out King Arthur Baking’s resources. Happy baking!
Nutritional facts for Garlic Herb Dutch Oven Bread
Calories per slice
Understanding the caloric content of your food is crucial, especially when baking delicious recipes like Garlic Herb Dutch Oven Bread. On average, each slice contains around 180 calories, making it a satisfying yet indulgent choice. It’s perfect for pairing with soups or salads without feeling overly guilty!
Macronutrient breakdown
Let’s dive into the macronutrients of this delightful bread:
- Carbohydrates: Approximately 35 grams per slice. These carbs give you that comforting, hearty feel.
- Protein: About 5 grams per serving, providing a nice little boost.
- Fat: Around 3 grams, mainly from olive oil and butter used for flavor.
This balance of nutrients can make your Garlic Herb Dutch Oven Bread a tasty addition to any meal. For more insights into nutritional values, check out resources like NutritionData or USDA FoodData Central.
With this knowledge, feel free to enjoy this homemade bread while keeping an eye on your dietary goals!
FAQs about Garlic Herb Dutch Oven Bread
What is a Dutch oven and why is it used for baking bread?
A Dutch oven is a heavy, often cast-iron pot with a lid, traditionally used for slow-cooking and baking. When it comes to baking bread, it creates a mini-oven environment that traps steam, resulting in a beautifully crispy crust and soft interior. The even heat distribution makes it perfect for our Garlic Herb Dutch Oven Bread, allowing you to achieve that bakery-quality loaf right at home. If you’re interested in learning more about the benefits of Dutch ovens, you can read more here.
Can I use active dry yeast instead of instant yeast?
Absolutely! While instant yeast is prevalent in quick bread recipes, active dry yeast can work just as well. Just keep in mind that you’ll need to activate it first by dissolving it in warm water (around 110°F) with a pinch of sugar for about 5-10 minutes, until it becomes frothy. This step helps ensure your Garlic Herb Dutch Oven Bread rises beautifully.
How can I store remaining bread to keep it fresh?
To keep your Garlic Herb Dutch Oven Bread fresh, store it in a cool, dry place. You can wrap it in a clean kitchen towel to maintain moisture while allowing it to breathe. Alternatively, if you have leftover slices, placing them in a sealed plastic bag or airtight container keeps them from drying out. For longer storage, consider freezing individual slices—just pop them in a toaster when ready to enjoy!
By following these tips, you’ll ensure that your bread stays fresh and delicious for as long as possible. Want to dive deeper into bread storage techniques? Check out this guide here.
Conclusion on Garlic Herb Dutch Oven Bread
Recap of the Benefits of Homemade Bread
Homemade bread, especially a Garlic Herb Dutch Oven Bread, isn’t just a delightful treat; it offers incredible benefits. You control the ingredients, ensuring freshness and flavor while avoiding preservatives. The act of baking can be therapeutic, making it a wonderful way to unwind. Plus, the aromas wafting through your home bring a comforting, warm feeling that takes you back to family gatherings and cozy nights in.
Encouragement to Give the Recipe a Try
So why not dive in? This Garlic Herb Dutch Oven Bread recipe is approachable and perfect for bakers of all levels. The payoff—the crispy crust and soft, flavorful interior—is truly worth it. Gather your ingredients, and unleash your inner baker today! Not sure where to start? Check out resources like King Arthur Baking for tips on mastering bread-making techniques. You’ll impress not just yourself but your friends and family too. Happy baking!
PrintGarlic Herb Dutch Oven Bread: The Easy Homemade Delight
A simple and delightful recipe for homemade Garlic Herb Dutch Oven Bread.
- Prep Time: 15 minutes
- Cook Time: 45 minutes
- Total Time: 13 hours
- Yield: 1 loaf
- Category: Bread
- Method: Baking
- Cuisine: American
- Diet: Vegetarian
Ingredients
- 3 cups all-purpose flour
- 1 teaspoon salt
- 1 teaspoon sugar
- 1 teaspoon dried oregano
- 1 teaspoon dried basil
- 1/2 teaspoon garlic powder
- 1 1/2 teaspoons instant yeast
- 1 1/2 cups warm water
Instructions
- In a large bowl, combine flour, salt, sugar, oregano, basil, garlic powder, and yeast.
- Add warm water and mix until a shaggy dough forms.
- Cover and let rise for 12-18 hours at room temperature.
- Preheat the oven to 450°F (232°C) and place a Dutch oven inside.
- Once heated, carefully transfer the dough to the Dutch oven.
- Cover and bake for 30 minutes, then remove the lid and bake for an additional 15 minutes until golden brown.
- Allow to cool on a wire rack before slicing.
Notes
- For best results, use high-protein flour.
- Experiment with different herbs to customize your bread.
Nutrition
- Serving Size: 1 slice
- Calories: 150
- Sugar: 1g
- Sodium: 200mg
- Fat: 1g
- Saturated Fat: 0g
- Unsaturated Fat: 0g
- Trans Fat: 0g
- Carbohydrates: 30g
- Fiber: 1g
- Protein: 5g
- Cholesterol: 0mg