Introduction to Garlic Herb Dutch Oven Bread
Why homemade bread is worth it
There’s something incredibly satisfying about baking your own bread. The aroma wafting through your kitchen, the anticipation as it rises, and the moment when you pull that golden loaf from the oven—it’s a sensory delight. But why go through the effort? Well, homemade bread allows you to control every ingredient. You can opt for high-quality flour, experiment with different textures, and, most importantly, tailor the taste to your liking. Studies show that baking at home not only saves money but also boosts your mood and creativity. Plus, nothing beats the satisfaction of serving warm, fresh bread to friends or family!
The allure of garlic and herbs in bread
Now, let’s talk about the soul of this dish: garlic herb Dutch oven bread. Garlic brings a punch of flavor that elevates even the simplest of recipes, while herbs add a fragrant touch that entices your senses. Think of the rich depth of flavor that garlic and rosemary or thyme can impart—each bite carries a hint of Italian kitchen magic! It’s no wonder that many people find homemade garlic bread irresistible; it perfectly complements soups and salads or stands proudly on its own.
As you prepare this recipe, consider the health benefits of garlic—it’s packed with antioxidants and known to boost your immune system. Combine that with the fragrant herbs, and you’ve got a nourishing loaf that’s as good for your palate as it is for your body.
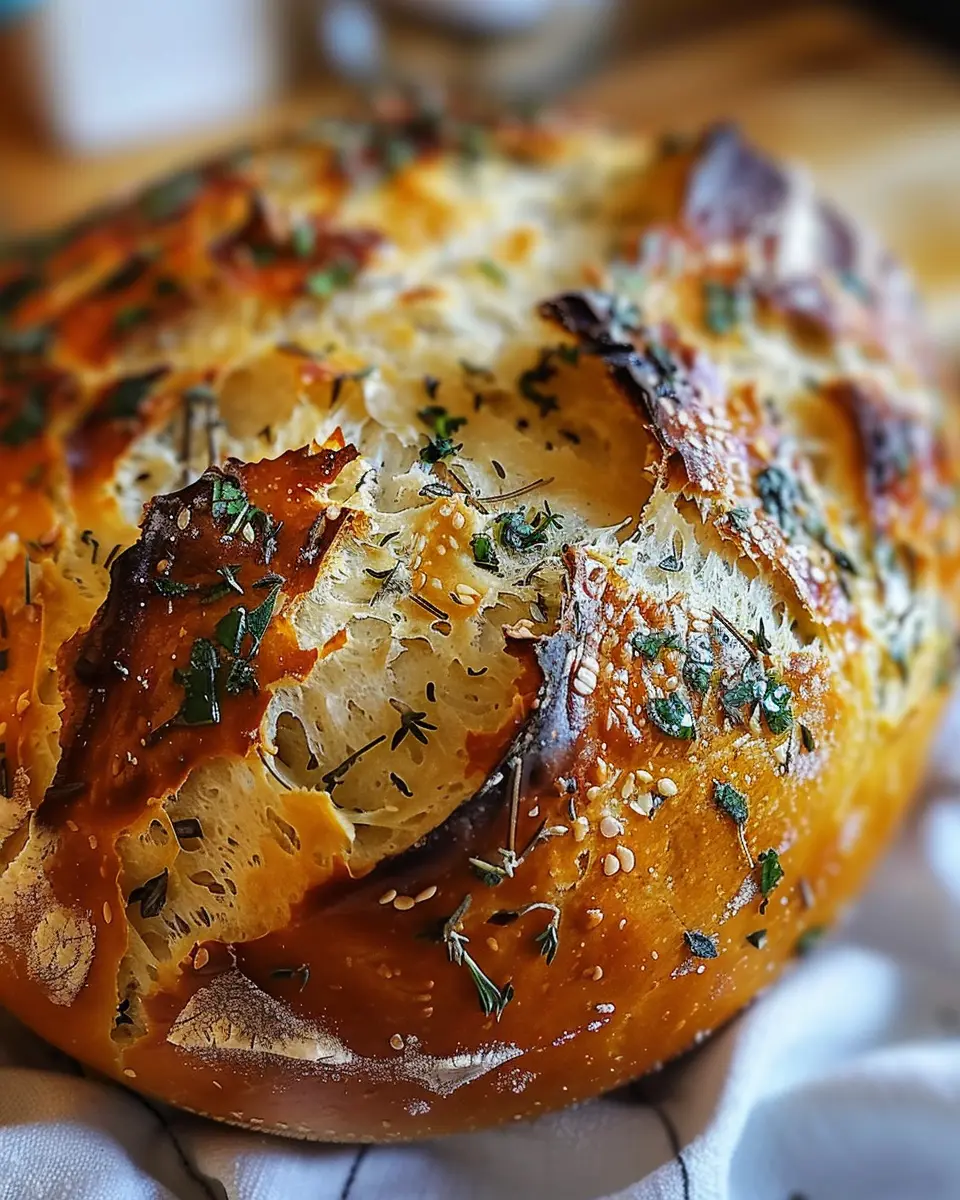
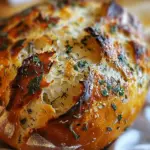
Envision this: You’ve just baked a loaf of garlic herb Dutch oven bread, and with the first slice, you hear that beautiful crackle of the crust giving way. Each bite reveals a soft, airy interior infused with the delightful essence of herbs and roasted garlic. Whether you enjoy it with a hearty soup or simply slathered with butter, you’ll quickly see why making this bread is worth every minute you invest.
As you embark on your bread-making journey, don’t forget to check out more in-depth techniques on artisan bread from sources like King Arthur Baking for inspiration and tips!
Ingredients for Garlic Herb Dutch Oven Bread
Essential ingredients for the perfect loaf
Creating a garlic herb Dutch oven bread that’s both fluffy and flavorful doesn’t require a long list of items. Here’s what you’ll need for that perfect loaf:
- All-purpose flour: The foundation of your bread. It provides the essential structure.
- Active dry yeast: This helps your bread rise and gives it that delightful texture.
- Warm water: About 110°F is ideal for activating the yeast.
- Olive oil: Adds moisture and richness to the dough.
- Salt: Essential for flavor; don’t skip it!
- Minced garlic and dried herbs (like rosemary or thyme): These provide the aromatic twist that makes this bread special.
If you’re curious about the science behind yeast and bread-making, check out The Art of Baking for more insights.
Optional add-ins and substitutions
Want to experiment a little? You can easily customize your garlic herb Dutch oven bread with these additions:
- Cheese: Sharp cheddar or Parmesan creates a rich flavor.
- Nuts: Chopped walnuts or pecans add a delightful crunch.
- Turkey bacon or chicken ham: Precooked and crumbled, this makes for a savory twist.
- Fresh herbs: Swap dried herbs for fresh ones for a brighter taste.
- Vegetable broth: Use this instead of water for extra flavor.
Don’t be afraid to mix and match—this recipe is all about making it yours!
Step-by-step preparation for Garlic Herb Dutch Oven Bread
There’s something undeniably satisfying about homemade bread, and what could be better than the aroma of garlic herb dutch oven bread wafting through your home? This bread is not just a tasty accompaniment; it’s a warm hug served right from your kitchen. Below, I’ll guide you through each step of the process to ensure your baking experience is enjoyable and, more importantly, delicious.
Mix the dry ingredients
Start by gathering all your dry ingredients. This is the foundation of your bread. In a large mixing bowl, combine:
- 3 cups of all-purpose flour
- 1 teaspoon of salt
- 1 teaspoon of sugar
- 2 teaspoons of instant yeast
- 1 tablespoon of dried herbs (think rosemary, thyme, or basil)
Mix these ingredients thoroughly. The instant yeast is crucial, and it saves time compared to active dry yeast. If you’re curious about the differences, this article does a great job explaining it. By mixing the dry ingredients first, you ensure that the yeast is evenly distributed throughout the flour, leading to consistent rising.
Stir in the wet ingredients
Next, it’s time to wet things up! Add to your dry mixture:
- 1 tablespoon of minced garlic (fresh is best, but if powder is all you have, use it)
- 1 ¼ cups of warm water
Stir everything together with a wooden spoon until it forms a shaggy dough. Don’t worry about getting it perfectly smooth; it will come together during the rising process. This is also a great time to get creative—feel free to experiment with additional flavors like cheese or chopped olives.
Let the dough rise
Cover your bowl with a clean kitchen towel or plastic wrap and let the dough rise in a warm, draft-free spot for about 1-2 hours. You want it to at least double in size, which indicates that the yeast is doing its job. If you need a little extra help with this, preheating your oven for a minute then turning it off creates a cozy environment for the dough.
Shape the dough
Once your dough has risen, it’s time to shape it. Sprinkle a bit of flour onto a clean surface to prevent sticking. Gently turn out the dough and use your hands to shape it into a round loaf. A simple trick to ensure a good shape is to tuck the edges of the dough underneath as you go along.
You might also consider letting it rest for a few minutes before the next step; this can make shaping easier and the dough more pliable.
Preheat the Dutch oven
While you’re shaping your dough, it’s time to get your Dutch oven ready. Preheat your Dutch oven in the oven at 450°F for about 30 minutes. Heating it beforehand is essential for creating that crispy crust we all love. If you’re using a non-enameled cast iron pot, place it in the oven with the lid on. This creates a steamy environment that will help your bread rise beautifully.
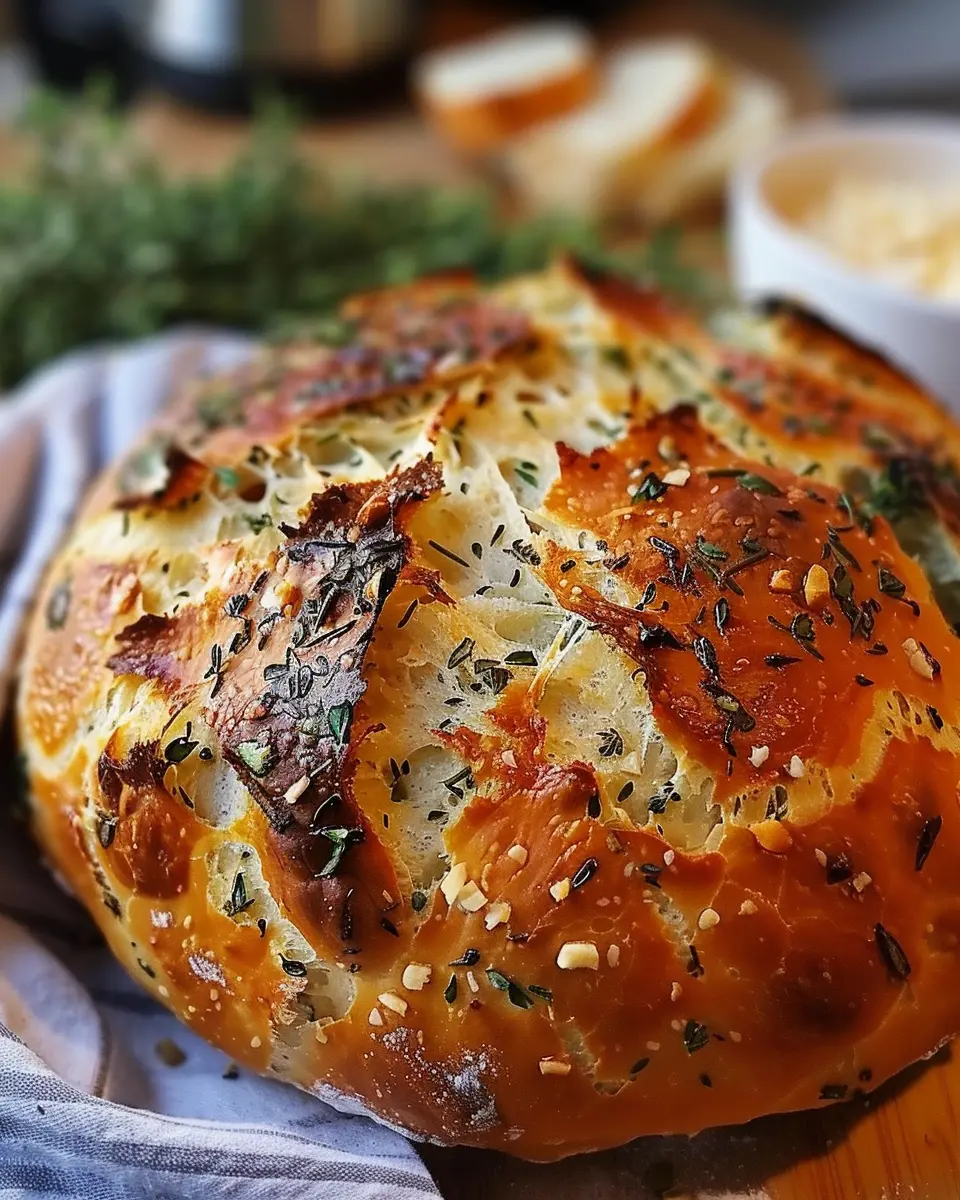
Bake the bread to perfection
Carefully take the hot Dutch oven out of the oven. Once it’s hot, place your shaped dough inside (you can opt for parchment paper for easy lifting). Cover it with the lid and bake for 30 minutes. After that, remove the lid and bake for an additional 15-20 minutes, or until the bread is golden brown and sounds hollow when tapped on the bottom.
Let it cool on a wire rack for at least 30 minutes before slicing. This gives time for the steam to redistribute inside the loaf, ensuring it remains fluffy.
And there you have it, a step-by-step guide to creating your very own garlic herb dutch oven bread. Enjoy it fresh with a drizzle of olive oil, or pair it with your favorite soups or salads! Happy baking!
Variations on Garlic Herb Dutch Oven Bread
Adding cheese for extra flavor
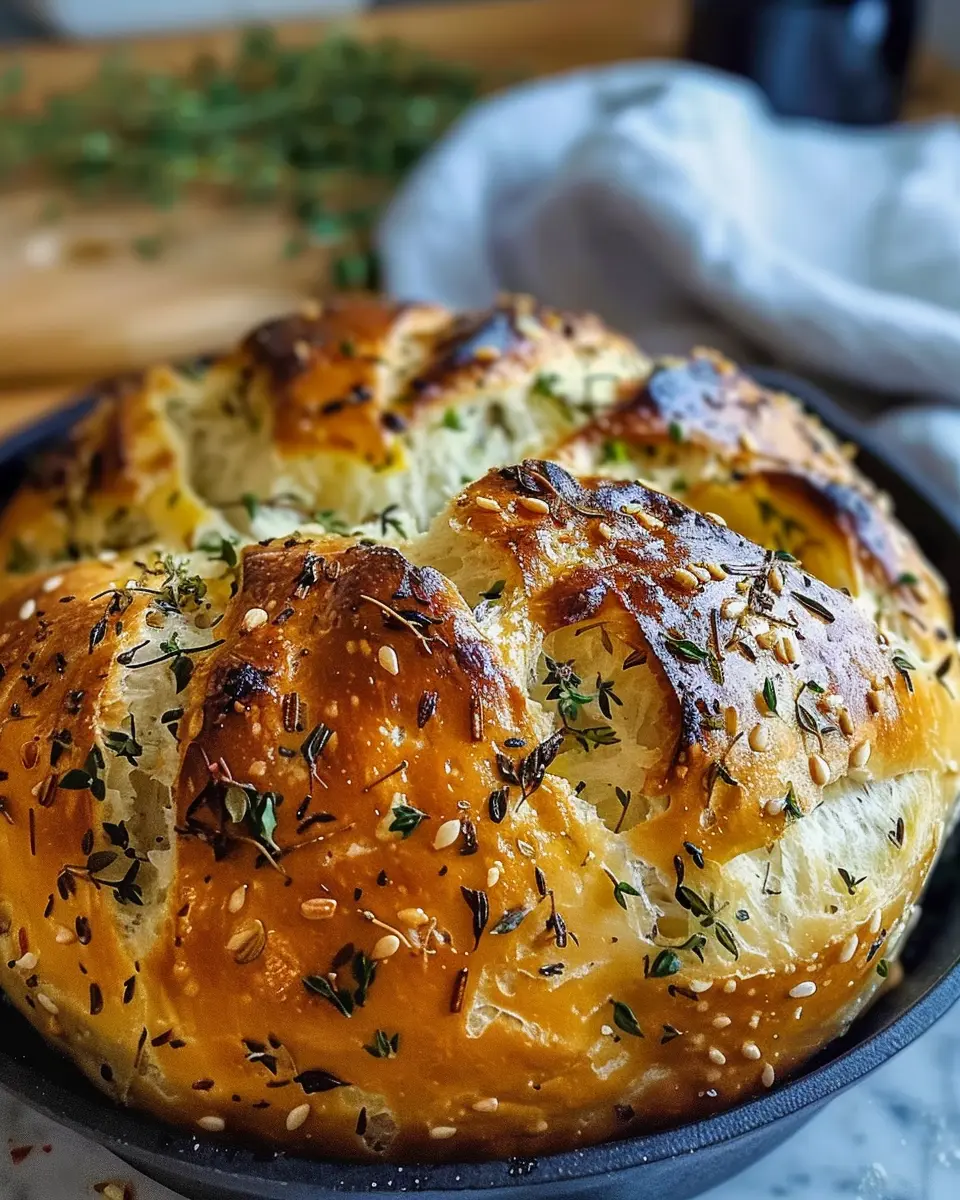
Imagine pulling out a freshly baked garlic herb dutch oven bread, only to discover pockets of melted cheese oozing with each tear. Adding cheese can elevate your bread to a whole new level. You might consider incorporating:
- Mozzarella: for that gooey texture.
- Parmesan: enhances the umami flavor.
- Cheddar: adds a sharpness that complements the garlic perfectly.
To make it even more interesting, try blending different cheese varieties! Just make sure to adjust the liquid in your dough slightly, as cheese can release moisture while baking. For a cheesy twist, sprinkle some on top just before the last 10-15 minutes of baking for that golden crust.
Experimenting with different herbs
The beauty of garlic herb dutch oven bread lies in its versatility. While garlic and parsley make for a classic combination, don’t hesitate to explore other herbs. Consider these additions:
- Rosemary: Its earthy aroma pairs beautifully with garlic.
- Thyme: Offers a subtle, savory depth.
- Basil: Provides a refreshing twist, especially in summer.
Mix and match your choice of fresh or dried herbs (the flavor will vary depending on which you choose). You could even switch out traditional garlic for roasted garlic for a milder, sweeter note.
Brewing up ideas in the kitchen can be exciting. Why not try a recipe variation that captures your taste? Use resources like BBC Good Food for inspiration on herb combinations. Your garlic herb dutch oven bread will never be the same again!
Cooking Tips and Notes for Garlic Herb Dutch Oven Bread
Common Pitfalls to Avoid
Making garlic herb Dutch oven bread can be a delightful experience, but a few missteps can leave you with a less-than-ideal loaf. Here are some pitfalls to watch out for:
- Overproofing: Allowing the dough to rise too long can lead to a flat bread. Keep an eye on the clock and the dough’s elasticity.
- Skipping the preheating: Always preheat your Dutch oven. This step is key for that crispy crust you desire.
- Too much flour: Measuring flour by scooping can lead to an overly dense loaf. Spoon it into your measuring cup for accuracy.
Tips for Achieving the Best Crust
Want that perfect crust? Here’s how to elevate your garlic herb Dutch oven bread game:
- Steam it up: Add a bit of water to the bottom of the pot right before covering it. This creates steam, helping achieve that coveted crust.
- High heat: Bake at a high temperature initially (around 450°F) to quickly develop a golden exterior.
- Let the bread cool: Once baked, cool the bread on a wire rack to maintain its crustiness.
For more insights on baking techniques, check out resources from the King Arthur Baking Company. Happy baking!

Serving suggestions for Garlic Herb Dutch Oven Bread
Perfect pairings for your homemade bread
When you whip up a loaf of garlic herb Dutch oven bread, the possibilities for pairing are endless! This aromatic bread is perfect for soaking up flavors. Serve it alongside:
- Soups and stews: Think hearty vegetable soup or beef stew, where every bite of bread can soak up that rich, flavorful broth.
- Cheese platters: Pair with a selection of your favorite cheeses, like creamy brie or sharp cheddar, for an effortless appetizer.
- Salads: A crisp garden salad drizzled with balsamic vinaigrette pairs beautifully, offering a refreshing contrast to the warm bread.
For an extra special touch, spread a bit of herb-infused olive oil or butter on top for that gourmet experience.
Creative ways to use leftover bread
Don’t let any of your garlic herb Dutch oven bread go to waste! Here are a few clever ways to repurpose leftovers:
- Croutons: Turn stale bread into croutons by cutting it into cubes, tossing with olive oil, seasoning, and baking until golden.
- Bruschetta: Top slices with fresh tomatoes, garlic, and basil for a delightful treat at your next gathering.
- Bread pudding: Transform leftovers into a sweet or savory bread pudding, incorporating ingredients like eggs, milk, and your choice of mix-ins.
With these ideas, you’ll not only enjoy delicious meals but also minimize food waste! Curious about more creative cooking tips? Check out BBC Good Food for useful resources.
Time breakdown for Garlic Herb Dutch Oven Bread
Creating your delicious Garlic Herb Dutch Oven Bread requires a bit of patience, but the end result is absolutely worth it. Here’s a simple breakdown of how long each step takes:
Preparation time
Getting started is a breeze! You’ll need about 15 minutes to mix your ingredients. Gather your flour, yeast, garlic, and herbs, and you’re well on your way!
Rising time
Now, this is where the magic happens. Let your dough rise for roughly 1-2 hours. During this time, feel free to catch up on a favorite show or enjoy a cup of tea—just let the yeast do its job.
Baking time
The baking process takes about 30-40 minutes. Ensure your oven is preheated and your Dutch oven is ready to create that perfect crust.
Total time
In total, you’re looking at around 2-3 hours. But don’t worry! Most of this is hands-off time, allowing you to enjoy your day while the bread rises and bakes.
For further reading on sourdough techniques and bread baking tips, check out King Arthur Baking or Serious Eats. Happy baking!
Nutritional Facts for Garlic Herb Dutch Oven Bread
When you’re indulging in the delightful flavors of Garlic Herb Dutch Oven Bread, it’s helpful to know a bit about its nutritional profile. Here’s a quick breakdown to keep you informed and empowered in the kitchen.
Calories
A serving of garlic herb dutch oven bread contains around 200 calories. This makes it a nutritious option for a side or a light snack, especially when prepared with wholesome ingredients.
Carbohydrates
Each serving offers approximately 40 grams of carbohydrates. While bread does provide energy, it’s important to balance your intake with fiber and proteins for a well-rounded diet.
Fiber Content
The garlic herb dutch oven bread contains about 2 grams of dietary fiber per serving. Fiber is crucial for digestive health and can help keep you feeling full longer. For more information on fiber benefits, check out Healthline’s guide on dietary fiber.
By making this bread, not only do you treat your tastebuds, but you also nourish your body with essential nutrients! So why not whip up a batch this weekend? Your taste buds—and your body—will thank you!
FAQs about Garlic Herb Dutch Oven Bread
Creating the perfect Garlic Herb Dutch Oven Bread might spark some questions. Let’s tackle your top FAQs to ensure your baking experience goes smoothly and deliciously!
How do you know when the bread is done?
Knowing when your bread is perfectly baked can be a bit tricky. Here are some signs to look for:
- Color and Texture: The crust should have a golden-brown hue and be nice and crispy. Give it a gentle tap – if it sounds hollow, it’s ready!
- Internal Temperature: For a precise check, use a kitchen thermometer. The ideal internal temperature for bread is around 200°F (93°C).
- Feel: A well-baked loaf will be firm to the touch without feeling too soft or doughy.
Can I make the dough in advance?
Absolutely! Preparing the dough ahead of time can save you some hassle:
- Refrigeration: After kneading, simply cover and refrigerate the dough for up to 24 hours. This can even enhance the flavor.
- Freezing: You can also freeze your dough. After the first rise, wrap it tightly in plastic wrap and freeze for up to three months. To use, thaw overnight in the fridge.
What’s the best way to store homemade bread?
To keep your Garlic Herb Dutch Oven Bread fresh and tasty:
- Room Temperature: Store it in a bread box or a paper bag for a crispy crust. Avoid plastic bags, as they can make the crust soft.
- Long-Term Storage: For longer storage, slice and freeze your bread in an airtight bag. Just pop it in the toaster when you want a slice!
With these tips, you’re all set to impress with your baking prowess! For further inspiration and guidance, check out resources like King Arthur Baking or The Kitchn for more bread-making tips and techniques. Happy baking!
Conclusion on Garlic Herb Dutch Oven Bread
Wrap-up and encouragement to bake
In summary, your garlic herb Dutch oven bread adventure awaits! There’s something truly satisfying about kneading dough and watching it transform into a golden, crusty loaf. Not only does homemade bread elevate your meals, but it also fills your home with an irresistible aroma that store-bought versions simply can’t match.
So why not give it a try? Gather your friends for a baking session, or enjoy a quiet evening trying out this recipe solo. You might be surprised at how easy it is to create something so delicious. For more tips on perfecting your bread-making skills, check out resources like King Arthur Baking and The Bread Lab. Happy baking!
PrintGarlic Herb Dutch Oven Bread: The Best Homemade Delight
Experience the delightful aroma and taste of homemade Garlic Herb Dutch Oven Bread. This recipe is perfect for any occasion.
- Prep Time: 15 minutes
- Cook Time: 45 minutes
- Total Time: 18 hours
- Yield: 1 loaf
- Category: Bread
- Method: Baking
- Cuisine: American
- Diet: Vegetarian
Ingredients
- 3 cups all-purpose flour
- 1 teaspoon salt
- 1 teaspoon instant yeast
- 1 tablespoon dried herbs (such as rosemary, thyme, or oregano)
- 1 1/2 cups warm water
Instructions
- In a large bowl, combine the flour, salt, yeast, and dried herbs.
- Add the warm water and stir until a shaggy dough forms.
- Cover the bowl with a kitchen towel and let it rest for 12-18 hours at room temperature.
- After resting, preheat your oven to 450°F (230°C) and place your Dutch oven inside to heat.
- Once hot, carefully remove the Dutch oven and place the dough inside. Cover and bake for 30 minutes.
- Uncover and bake for an additional 15 minutes until golden brown.
- Let the bread cool on a wire rack before slicing.
Notes
- For extra flavor, you can add minced garlic to the dough.
- This bread is best enjoyed fresh but can be stored for up to 3 days.
Nutrition
- Serving Size: 1 slice
- Calories: 200
- Sugar: 0g
- Sodium: 400mg
- Fat: 1g
- Saturated Fat: 0g
- Unsaturated Fat: 0.5g
- Trans Fat: 0g
- Carbohydrates: 42g
- Fiber: 2g
- Protein: 6g
- Cholesterol: 0mg